#woodworking

104 posts · Last used 22d

Hello, Mastodon! 👋 We're HIRFA, a brand creating handcrafted wooden goods in India. Here's a look at one of our wooden watch boxes, designed with natural wood and thoughtful details. We believe everyday objects can carry lasting meaning. Looking forward to connecting with people who appreciate craftsmanship and timeless design. Buy liink - https://hirfainternational.etsy.com/in-en/listing/4597462735/personalized-wooden-watch-box-for-men #Introduction #Woodworking #Handmade #watch
1
0
1
0
A couple of months ago I bought an #Opinel, which is French for "very sharp knife". Meanwhile, my kids have been bringing sticks home. My daughter calls one "the wolf" because one end looks like a canine head. I used the knife to peel it off (except at "the head") and carved just a little bit to accentuate the resemblance. I might buy linen oil and cover it. I could convert it into a pen/cil holder, but the wood is quite soft and might wear off too quickly. Suggestions welcome. #WoodWorking
5
3
2
0
Today's #DIY #WoodWorking project at the Yama-no-Furusatomura’s crafty hut! I actually bought the cabinet on the auction site mercari, so today’s DIY was kitting the cabinet out with a speaker, wirings, a Perspex panel for a topside jack, installing a jack panel by drilling a hole in the rear panel, and installing a faux leather handle on the side of the cabinet. I think it turned out beautifully! 👍 #Japan #summertime #weekend #craft
15
3
4
0
It has been a while since I posted a #woodworking project. This is a small 3-leg #staked #stool that I made this summer. Just made out of a softwood 2x6 (I think spruce) as a bit of a prototype and practice piece. Next time I will use some hardwood and make 6-sided legs, so I can add some stretchers between them. Some mistakes were made, notably I had to re-drill the leg holes as my first try did not have the correct angle. But it was a fun project, especially playing with spokeshaves to make a round, chamfered top. The build used a surprisingly large amount of tools. I think I counted over 16: saws, plane, spokeshaves, measuring tools, drill, chisel, etc.
23
2
5
0
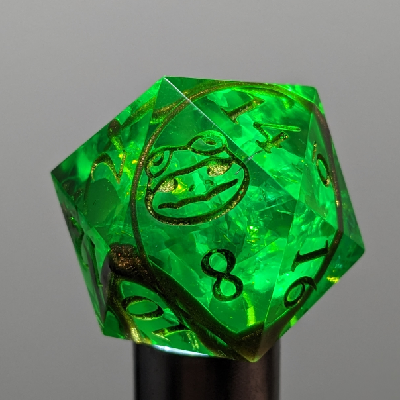
An #introduction! I am evilchili (he/him). For 35 years I worked in the tech industry. Now I'm on my New Game+. I make #resin dice. I've been running a #dnd game for the same group every two weeks for 9 years. I homebrew relentlessly, and never met a system I didn't want to tinker with. I will be posting about all that plus #crafting, #woodworking, #boardgames, #videohames, and whatever else I spend my free time on. I might even write some #software now that I don't have to. :noAI:
35
6
14
0
Woodworking rant about the community being judgemental
14
2
8
0
Sandra Christopher built a clothespin business to heal — Now she is ready to let it go Sandra Christopher spent 23 years in policing before retiring with what she calls an overuse injury to her soul. She found healing in her woodworking workshop — making handcrafted clothespins one at a time.
0
0
0
0
#TorontoON - #Site3CoLaboratory "#Site3 #CoLaboratory is a volunteer run #MakerSpace in #Toronto’s west end, at Ossington and Bloor. The shop is 2000 square feet and is fully equipped with #woodworking tools, #metalworking tools, #3DPrinters, electronics and more! See our 'Tools & Materials' page for more info and a complete tool list. The vision for our organization is to provide an inclusive space that promotes a four step cycle of create, display, teach and inspire. - Build and maintain an inspiring space and community that provides members with access to the right tools and knowledge to create anything they can think of. - Display, promote, and support member made projects. - Teach new #skills through regular events, #workshops, and #classes. - Inspire communities to bring their projects to life with our #CollectiveKnowledge, tools, and support. - Interested in learning more? Come by Site 3 for a tour any Thursday between 7-10pm! Membership Site 3 is 100% volunteer run and is a registered Ontario non-profit organization. We are a community of makers, artists, inventors, tinkerers, learners, teachers, and much more. If this sounds like your kind of thing, maybe you should join us? Membership Levels The membership structure consists of three levels. All three membership levels pay the same monthly dues of $60 plus #HST with different privileges for each membership level. We have a minimum 2 month membership period meaning your first and last month’s membership fees will be charged upon signup ($120 plus HST). Storage lockers are available at an additional monthly fee." FMI: https://www.site3.ca/ #SolarPunkSunday #Ontario #CoLaboratory #MakerSpace #ToolLibrary #VolunteerHours #BuildingCommunity #Makers #DIY #SharingKnowledge

4
0
8
0
Replying to
Next thing it revealed is that the front of the slider track is going to butt against my face board after I drop it down. So I'll need to notch for that or something. #woodworking
7
7
1
0
Replying to
Last thing, at the back of the drawer, the Blum slides have these tabs that insert into a pre-drilled hole on each side. My drawer is 3/8" short. So when they say the drawer needs to be 18" deep, does that mean I need to add another 3/8" to get these tabs to sit in it? 🤔 cc @Rajiv@infosec.exchange @davepolaschek (since I think you both said you've installed the Blum Movento before) #woodworking
4
6
2
0
Replying to
So with the drawer experiment done and all of the dimensions and complications revealing themselves, I'm feeling "ok" about it because these slides really are awesome. But I'm also a little disappointed because without a false front, the sides of the slides will peak through. And when the drawer is open, there will be a small notch at the bottom of the face. Sigh. Anyway, I don't feel like doing with again with another type of slide so I'm just going to drive on. #woodworking
4
5
2
0
Replying to

I have a choice of what I'm going to work on next:

  1. Top doors: there will be two that swing out and it will open to show shelving inside
  2. Back panels: this will be cedar and I can use my super fun Lie-Nielsen tongue and groove plane
  3. Bottom drawer: one large storage drawer. More walnut. I have to figure out heavy duty slides.

I kind of want to play with the t&g plane but I found this 12"+ walnut some time ago and it will be perfect for the drawer face. So I might just get started on that next.

#woodworking

12
14
3
0
Replying to
There is only one way to eat an elephant: a bite at a time. My elephant progress continues. I installed the drawer divider into the case and it all lined up as well as I could have hoped. #woodworking
24
13
3
0
Replying to
Before that, I had an accident with the case falling and it smashed one corner pretty terribly. A very silly and careless accident. I had to spend some extra time taking off a 1/4" from all around the front edge to get it out. That sucked but I had just enough room next to the first dovetail to get it out and the miters look cleaner now. #woodworking
16
12
1
0
Replying to
Onto the drawer! The front face is going to be the large walnut board I mentioned last week and rummaging through my wood stock, I have a bunch of 6/4 cherry that has been sitting for a few years now. I'm going to use that for the sides. I didn't have enough for the back though and since nobody is going to see that (plus the drawer is getting to be mighty heavy with walnut + cherry), I pulled out an equally old 7/4 poplar board. I felt bad wasting it since the final thickness will probably just be 1/2" so I resawed a 35" section which was a MASSIVE PITA. I did it but don't think I'll do that again. ugh. Rough cuts are done and next weekend I'll try and bring them into the garage to thickness. #woodworking
11
11
2
0
Replying to
Drawer pieces are now thicknessed and Blum slides arrived but now I'm a little worried about how to assemble the drawer with my design. 🤔 I want half-blind dovetails set into the visible face panel; not a false drawer front. And it should fit flush inside the case with just a very small gap around. But now that I'm looking at these slides, I feel like it's going to need a much larger gap at the bottom than I expected. I've never done this before and I can't afford any more time or money messing up the drawer so, I'm constructing a practice box and drawer (sigh). I probably just need to leave space below the first dovetail but how much space? Soon I'll know. #woodworking
11
10
2
0